The swap continues

By now there should be packets of tiny squares zipping around the world finding their way to swap partners!

If you’re still yet to make contact with your swap partners, please do so. I’ve emailed everyone I’m swapping with now to exchange addresses and am still waiting on a couple to let me know where to post their squares to. (That’s ok, squares don’t have to be posted until the 12th) I did spend a good hour on the weekend packaging up all my squares, making sure I put them in little plastic baggies so that they wouldn’t get damaged or wet in transit etc. It was fun and I can’t wait until I can send the remaining few off to their new homes.

PSQ Envelopes to partners

Another thing to note is that we do have a couple of people who appear to have gone AWOL. If you are paired with one of those people, please be patient. I will give them until the 10th to make contact and if they still haven’t then I’ll arrange new swap partners for you. If you have extra squares and would be happy to volunteer to swap, comment below and I’ll be in touch if I need your help.

But in happy, fun news, I’ve already received one lot of squares! Aren’t they beautiful? I simply adore the card and the squares are from great fabrics. (Check out that lion!) Thanks Natalie C, I’m thrilled.

PSQ 2015 Swap Natalie Note PSQ 2015 Swap Natalie Squares


That’s it from me today – I’m off to my full time day job now and will spend the evening arranging backup partners for the people affected by AWOL swappers. Happy swapping everyone and I hope some squares are arriving for all of you over the coming days so you can share my excitement.

Next week I’ll be sharing some photos of the squares that have arrived to use all so if you would like to lay out your new squares and take a photo and send it to me, I’ll include it for everyone to enjoy.

The Postage Stamp Quilt Square Swap has begun!

PSQ Swap badgedates

Sign ups to the first ever Jess Made This Postage Stamp Quilt Square Swap have officially closed. All swappers should now have received an email letting them know who they will be swapping with.

Your job now is to get in touch with all your partners and to post off your bundles of squares by the 10th of March. 

If you have any problems getting in touch with any of your partners, give them a day or so to respond before getting in touch with me. Sometimes life happens and the swap is the last thing on our minds. Being mindful of that can make it less frustrating when communication mishaps happen. But if you can’t solve it yourself, send me an email and I’ll find a solution to suit everyone.

I think this has shaped up to be a good little swap and we have lots of people involved from different countries so the fabric variety should be impressive. If anyone would like to take a photo of the squares they receive and send it to me, I’ll make up a fun post showing all the squares sent out and the stats involved in the swap.

But that’s enough for now, I’ve got to get onto emailing all my swap partners! If you’ve got any questions about the swap or if you’re having trouble reaching a partner, feel free to use the comments section below as a message board.

Happy Swapping everyone!

DIY Upcycled Bookmarks


This week I had an absolute blast making a bunch of bookmarks from scrap paper and a really old melways I discovered hiding in my car when it was written off earlier this year. I hunted around online for some inspiration and in the end made 3 different types of bookmarks:

– one from a spine label of a book

– one using text from The Hunger Games

– 0ne using the Melways paired with a favourite quote of mine.

I’ve made some quick tutorials for anyone else wanting to make the same. For the bookmark template, just google around online until you find one that you like. These bookmarks are all pretty basic so changing the template won’t ruin it.

JMT Hunger Games Bookmark Instructions JMT Spine Label Bookmark Instructions JMT Favourite Quote Bookmark Instructions

After making the above three I admittedly did get a bit carried away and made a few more quote bookmarks. I think they look pretty cool though:

IMG_2796


Have you made any awesome DIY bookmarks from old paper or old books? I’d love to hear about it if you have, leave me a message in the comments section.

Wonky Houses

This week I had a go at a Wonky House Block for a Facebook Group Swap that I signed up for. I had so much fun making it that I’m looking forward to making many more.

There isn’t a set pattern used to make one of these – it’s more a sew-and-make-it-up-as-you-go type projects. Using the basic guidelines over at The Sewing Chick it turned out to be a lot easier than it looked – and a lot of fun! I won’t reinvent the wheel by churning out her instructions again, just click here to have a read.

IMG_2721


As you can see, it also created a lot of mess! But it also turned out pretty cool. My obsessive need for order and straight lines made it pretty hard to deliberately make it wonky but I’m hoping to have more of that in the next one I make.

Wonky House Swap 2015 3

I’m thinking a whole quilt made out of these would be pretty cool – has anyone else made one before? Also, if anyone would like to join the swap, sign ups are open until Feb 15!

Duct Tape Wallet DIY

This week I had a go at a project I’ve been eyeing off for almost two years – the duct tape wallet. Despite having an abundance of duct tape at my house, I haven’t attempted this until now. I really wish I’d given it a go earlier instead of passing it off as being too hard because it was ridiculously easy. It only took me 20 minutes to turn a bit of duct tape into a useable wallet. As far as last-minute, inexpensive Christmas gift ideas go, this is a winner. There are heaps of tutorials for different styles on the internet, but this one is by far the easiest one I found.

So without further ado, here is how to make one for yourself:

Step one: Cut four strips of duct tape approximately 10 inches long. With the adhesive side up, adhere the duct-tape strips one to another with a 1/4″ overlap.

IMG_2407  step1


You now have a sheet of duct tape that is roughly 10 inches by about 7 inches. Don’t stress too much about the size at this point because we will trim it down later. Make a second sheet.

Step two: Very carefully adhere the two sheets with sticky sides together. I used a ruler to smooth out the bubbles as I went, but whatever method you come up with will be ok. Once adhered together, rub over to smooth out any bubbles.

IMG_2409


Step three: Cut a 10 inch strip of duct tape. Use a utility knife or scissors to cut the strip down the middle into 2 strips that are 1inch wide and 10 inches long. This can be super fiddly as the tape kept getting stuck to my scissors, so take your time! If you can’t get the strips exactly straight, don’t stress. This is a DIY project after all!

Fold the 1 inch duct-tape strips over the edges of the 10 inch ends of the sheet. This will make a smooth, clean finished edge.

IMG_2411  step4


Step four: Using scissors or a rotary cutter, trim the jagged edges off to leave a sheet of tape that is 9 inches wide.

IMG_2413


Step five: Fold the sheet in half so that the 10 inch sides are touching. Cut two 1inch x 4inch duct tape strips using the process in Step 3. Fold and stick the ends of the duct-tape wallet together using these 1inch strips. Trim off any excess.

IMG_2415


Step six: Technically you can stop here and you have a functioning notes wallet. But if you’re keen to add a pocket for bank cards etc, read on. Cut two strips of tape 5 inches long and stick the two pieces together with sticky sides in the middle.

Like in steps three and five, stick a 1″ strip onto one of the 5″ edges to make it nice and neat. Trim the pocket to 4″ long.

IMG_2414  IMG_2416


Step seven: Using 1/2 inch strips of duct tape, stick the pocket in place as shown on the diagram below. Trim the strips flush… and you’re done!

step10IMG_2418


IMG_2419


DIY Last Minute Fabric Squares

I can’t count how many times I’ve been sewing together a bunch of 2 inch squares into blocks of 100 when I’ve realised that I’ve got a duplicate square or I’ve mistakenly counted out 99 squares instead of 100. In scenarios like this when I’m mid-way through a block, have no more fabric to cut from and don’t want to/can’t go out to buy more fabric, I make my own.

It’s a fairly simple process involving grabbing some calico or plain white quilters cotton along with a bunch of permanent fabric markers.

Step one: Cut out some 2 inch squares using your fabric cutter or rotary blade.

IMG_2481

Step 2: Gather your supplies and get decorating with your fabric markers to create squares in just the right colour/pattern for your needs. I use both Sharpies and Crayola permanent fabric markers. I find the Sharpies tend to bleed more and give more of a tie-dye effect whereas Crayola holds the ink in the fabric normally.

IMG_2482


Step 3: Follow the directions on the Fabric Markers you own in regards to heat setting the colours. Each one is different so I won’t go into that here. For the blue swirly one I used Crayola and deliberately help the markers down to the fabric longer to get the fuzzy lines. For the orange and red ones I used Crayola – you can notice how crisp the lines are. In the purple and pink one I drew pink and purple stripes using the Sharpie pens and then folded the square in half and rubbed the two sides together. The ink mixed together and created that smudgy look.

IMG_2483

Now while these squares look awesome and served my purpose exactly when sewing up quick blocks of 100 squares, I wouldn’t recommend swapping squares you’ve made yourself using permanent fabric markers. Before using them at all you need to test them in a bucket of water to make sure the ink has really set and won’t ruin your quilt/patchwork project in the washing machine. Even if you’ve done this and they are all right, you don’t want to be the reason for an ink run on someone elses quilt/project. It’s a fun technique, but not for swapping — unless of course we ran a themed swap like it…. we shall see how the first one goes.

3D Hand Drawing

I’m currently developing a monthly craft program to run in libraries and thought a session on 3D drawing would be fun. But before pitching that idea, I needed to test it out and see how difficult it was. As someone who doesn’t do virtually any drawing… I wasn’t overly optimistic about the project. But as you can see below, it turned out to be remarkably simple and look pretty cool.

3D Hand Drawing Tutorial:

Step one: Using a pencil, draw an outline around your hand.
3D hand drawing


Step two: Use a ruler and a black marker or pen to rule straight lines up to the edge of your hand outline on both sides. Inside the outline of your hand, use the pen or marker to make a curved/slightly raised line as shown. Continue until you’ve covered the entire piece of paper. Curving around the tips of your fingers can be difficult so I recommend drawing the curves for them first and then placing the horizontal lines outside of them afterwards.

IMG_2392 IMG_2393


Step three: Start drawing coloured lines underneath the black marker lines. You can use as many or as few colours as you like, or you can even just stick to black and white. This step can take an AGE or if you’re less pedantic than me, you can complete this in around 30mins to an hour.

IMG_2394 IMG_2396


Step four: Step back and look at your completed 3D drawing! If done correctly it should look like the hand is popping out of the page.

IMG_2399 IMG_2397


Here are some other awesome ones that other people around the internet have done:

3d-Hand-Drawing

   Bright by “Speed Skating Mum”

By "Creative Eye Candy"

A more relaxed version by “Creative Eye Candy”

Highlighter version by "Made with Love"

Highlighter version by “Made with Love”

This technique can be used to make anything look 3D. From a drawing of a spatula to the alphabet. The part around the thumb is absolutely the hardest (of a very easy project) so remember to keep an eye on it as you add lines. This is a really fun project that looks a lot harder than what it actually is. My recommendation? Give it a go!


DIY Emergency Koala Mittens

Last week Victoria and Adelaide felt the full force of summer heat with numerous out of control bushfires and many homes & lives lost. Fortunately many animals, houses and people were saved due to the dedication and hard work of the CFA. But like the numerous people who lost their homes, many animals emerged with devastating injuries. One such group of animals was the koalas – rescued with third degree burns to their paws and tummies as the trees they were in burned and they ran across burning ground to escape the fire.

10923263_766019116807651_7613653955948355732_n

The International Fund for Animal Welfare put out a call on Facebook last week asking for people to make and post Koala Mittens to them. They are used in the wrapping of burnt paws and need to be changed multiple times per day – which means each koala with burnt paws is going to need a LOT of mittens over the course of their treatment.  Mittens had to be made from 100% cotton fabric and sent to IFAW at 6 Belmore Street, Surry Hills NSW 2010

Naturally I sat down last week and got to work sewing up some mittens as per the pattern provided.

Step 1:

Download the template & instructions for how to make the mittens. Click on the pic below and you’ll be redirected to a full-size printable version.

1459342_771090609607318_3909465385309526413_n

Step two:

Cut out your mitten pieces.

IMG_2474 IMG_2476

Step three:

Grab some ribbon or cut off some excess fabric in the length and width specified in the instructions.

IMG_2477

Step four:

Place the ribbon/fabric tie piece where the x on the pattern specifies then sew around the edge of the mitten, being sure to sew over the end of the fabric tie in the process.

IMG_2478

Step six:

You’re done!

IMG_2479

I’m thrilled to announce that there was an overwhelming response to the callout for these mittens and within just 7 days of asking for more, the Foundation for Animal Welfare had more than enough to distribute around to the various animal shelters, wildlife carers and vet practices. The generosity and general craftiness of people in Australia always astounds me. I’m so thrilled we managed to work together to provide enough to help the koalas! And we even have a reserve of surplus mittens for the next time our bushland is devastated by fire.

But for now, it’s “mitten accomplished”!

10898113_773633879352991_9003202674018692122_n-1

Postage Stamp Quilt Square Swap 2015

In 2015, Jess Made This will be running multiple 1.5″ and 2″ quilt square swaps, depending on interest. The first one will be held at the end of February with all squares to be posted out to swap partners by the 10th of March.

Many of you will have participated in a swap such as this before and this swap is very much the same. The idea is that we all prepare at least one batch of 100 unique squares in sizes of either 1.5 inch or 2 inch, we receive our swap partners and we post our squares off while waiting for a batch to arrive for us. Patience is definitely required in a swap like this – sometimes people go AWOL, get sick or have a crisis and the swap is the last thing on their mind. If that happens to one of your swap partners, I will endeavour to sort it out as quickly as possible for you. Please don’t send angry emails to your missing swap partner – just contact me and I will sort it out. My email is: barlow-jess@hotmail.com

Sign ups are now open for this swap. Please comment below with your name, email address, country, preference for types of squares, and how many lots of 100 squares in either 1.5″ or 2″ you are willing to swap. (Please do not comment with your mailing address for security reasons.) I will match you up with  other swappers and send you a list of your swap partners & their email addresses by the end of February. At this point it is your responsibility to contact your swap partners and exchange mailing addresses. It goes without saying that you should keep their contact information private – do not share it with others. Sign ups will close on February 25 to allow me time to do this.

Here is a sample of what I would write if I wanted to sign up to this swap:

  • Name: Jessica Barlow
  • Country: Australia
  • Email: barlow-jess@hotmail.com
  • Squares: I love quilting with novelty, bright (always on the lookout for purple and orange) and animal squares if possible. I also love surprises though so send me what you’ve got!
  • Swap: I have 4 matching sets of 2 inch squares to swap.

Before signing up, please make sure you have cut and prepared all squares you want to swap. This is as a courtesy to other swappers so they don’t have to wait for you to cut out squares at the last minute.

A few other basic guidelines to observe are:

– All fabrics must be quality quilting cotton fabric. If you wouldn’t sew with it, don’t send it to someone else.

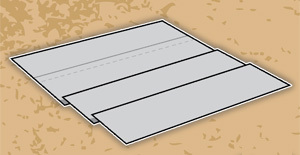
– All squares must have been cut, either with scissors, rotary blades or cutters like the GoPro. Do not rip squares as that will cause fraying and compromise the quality of the fabric.

– All squares in each batch of 100 must be unique (ie. no duplicates). It can come from the same piece of fabric, but try to make sure it is obviously different. Include a mixture of colours, solids, patterns, batiks, metallics, fussy-cut and novelty squares as well. (No one wants a batch of 100 solid colour squares!)

– Specify whether you have matching or unique sets of fabric. If you have cut out 3 multiple squares from 100 different fabrics, then you would have 3 matching sets of 100 squares. But if you cut out 400 squares from 400 different fabrics then you would have 4 unique sets of 100 squares.

– You can swap up to five sets of 100 squares in each size. So, 5 sets of 2″ squares and 5 sets of 1.5″ squares. But you can also swap just one set of 100 in one of the sizes too – whatever suits!

– This is an international swap which means you must be prepared to pay for postage to other countries. But remember, that overseas person will be sending you something back in return so it balances out.

– Try to include a nice note or link to your blog etc in your package of squares that you send and be sure to follow up with your swap partners to ensure that they received your squares.

– 1.5″ and 2″ squares will fit into standard envelopes for posting. If posting internationally you will need to fill out a customs form which for most of you will require going into the post office in person. Put a simple description down such as ‘fabric squares’, categorise the envelope’s contents as a gift valued between $3 and $5.

– All squares must be posted out to your swap partners by the 10th of March. Ie. all squares should have been dropped off at the post office by this date. International and domestic shipping times vary so be aware that some packages might take longer to arrive than others. Keep your swap partners informed about when you’ve dropped their squares at the post office.


Finally, if you’re participating in this swap, be sure to pop the below badge onto the sidebar of your website or blog with a link back to this page. It will help attract more people to the swap and more people means more diversity in squares (always a good thing!) If you’re not sure how to add the badge to your blog, put ‘adding badge to blog’ in a google search and multiple tutorials will appear to help you out.

PSQ Swap badge

So what are you waiting for? Go and count how many squares you have ready to swap, cut out some more and then sign up below for some Postage Stamp Quilt Swapping Goodness in 2015!

Important dates to remember:

Sign ups are open now and close on February 25. 

Swap matches will be emailed out by March 1. 

All squares to be put in the mail for swap partners by March 10.

DIY Sleeping Mask

A few weeks ago I wrote a post about my DIY Christmas Gift using upcycled Milo Tins. Well this time I thought I’d write about some DIY gifts I made last year and didn’t blog about at the time – DIY Sleeping Masks.

If you conduct a Google Search for DIY sleeping masks you will find countless templates of various shapes and sizes. I tried about three different ones before I found one that suited me and those I was making them for. A couple were really big and another was just a bizarre shape. After printing them out I was able to better see the shape so I recommend printing out a few before deciding which one will suit you.

IMG_1398

Front Side.

IMG_1397

Back Side.

The process is really simple. You cut out two pieces of fabric according to the template. Face right sides together, pinning elastic at the sides, and sew around the outside with a 1/4 inch seam. Be sure to leave a gap so that you can turn it right side out.

At this point I added a step and ironed my mask. It made it a lot easier to sew the gap closed neatly as the fabric wasn’t buckling out of shape. Then sew around the edges, again with a 1/4 inch seam. If you’re like me and like embellishing the front of your face mask, be sure to do this before sewing it to the back side of the eye mask – otherwise you’ll have uncomfortable lines of thread resting on your face while trying to sleep.

Here is another one I made:

IMG_1411IMG_1412

On a more festive note, I’m taking a break over Christmas and will resume writing blog posts in 2015. Merry Christmas to all!